I joined the Australian Electric Vehicle Association (AEVA). The Geelong sub-branch has helped me convert the Imp. The members suggested using a used Toyota Prius Electric motor and differential minus the ICE. The conversion would replace both the original engine and gearbox. It would require modifying the drive shaft between the unit and the wheels. However, it was not suitable as the Hillman Imp gearbox under the rear seat. Prius drive chain was too tall. Another option was to use the Toyota RAV4 hybrid rear motor on the 4WD model. This unit contains an electric motor and differential. Again, the drive shaft to the wheels would need to be modified, But it was just a little too tall to fit.
While investigating these options, I viewed YouTube videos on Toyota Prius
repairs by 'WeberAuto' (John Kelly). Also, see their web page.
Used motors from wrecked EVs are too big. I looked at buying a new motor.
Most are too powerful for a small car or too small, suitable only for
golf carts, etc.
Original Imp Motor Specifications
Imp Leaflets for more details.
Engine: 4 Cylinder 875cc (cm3)
Horsepower:42HP @amp 5000rpm (31.3kW)
Torque: 52lb.ft @2800rpm (70.5N.m)
Weight: 13.5cwt ( 686kg)
The electric Motor
The HPEVS AC-51 or the Motenergy ME1616 appeared to be about the right
size for the Imp. I purchased the Motenergy ME1616 motor.
Motor Specifications
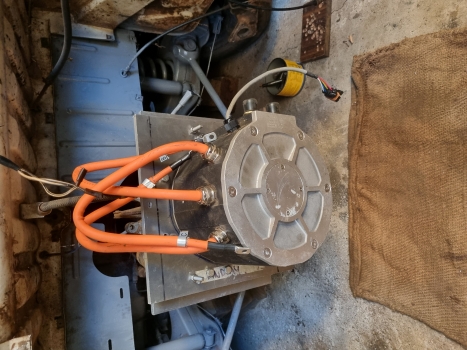
Electric Motor: Motenergy ME1616
Brush-less 3 phase Permanent magnet motor Liquid-cooled,
closed frame, sealed motor to IP65 (Note 1)
Operating at 24 to 100 V DC
250A Continuous, 550A (1min)
6000rpm max.
Weight 25.2kg
From the performance graph supplied with the motor.
Power: About 32kW at 5000rpm
Torque: About 75M.m from 0 to 4500rpm, falling to 62N.m at 5000rpm.
Note 1: IP65 is a water resistance rating that means a product is
protected against water jets from any direction, but it's not fully
waterproof. It can be used outside in the rain.
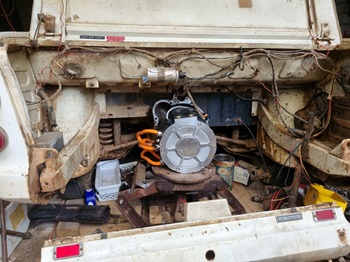
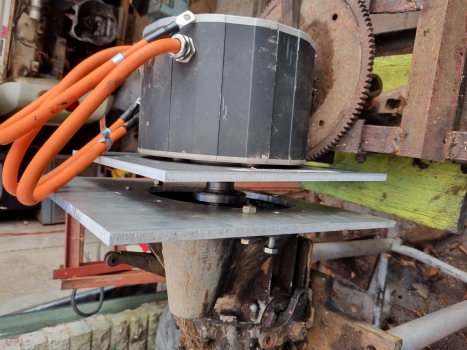
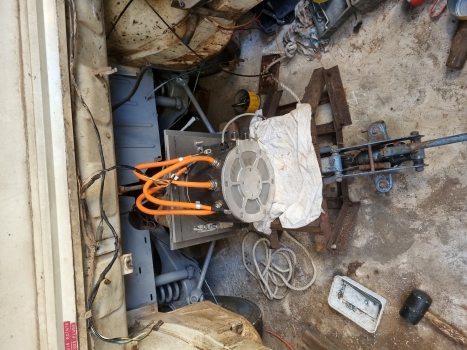
The electric motor will be in place of the original Imp motor, and they
will use the original clutch and gearbox.
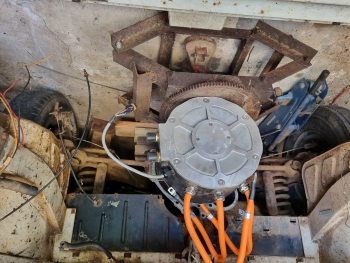
The electric motor is on a Homemade gearbox jack used for clutch replacement/repairs. Things are done differently with the Hillman Imp.
The coil and the generator regulator are still to be removed.
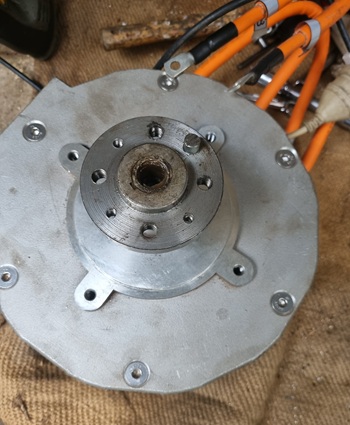
Ring gear removed from flywheel
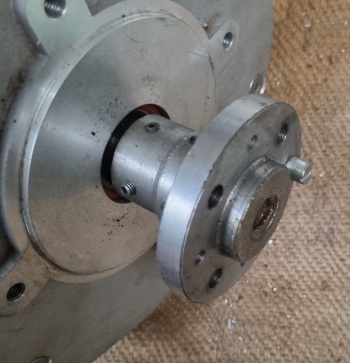
The engineering work cut a keyway in the flange. The engineering work also machined the flywheel to lighten it. A self-lucubrating bearing was purchased and fitted for the gearbox shaft.
The lathe work was not as easy as it should have been. My Chinese-designed and made lathe was not big enough, and the quality was lacking.
I had a 10 x 340 x 360mm thick plate laser cut with a 114.8 mm circle and four bolt holes for 5/16-inch bolts. They could only cut it from a full plate, not a small bit supplied by me. It costs $90, including the Aluminium plate.
Aluminium Plate Made to Fit onto the Gearbox.I drilled a hole in the centre to fit the Aluminium plate. I clamped it to the gearbox. I drilled from the back of the gearbox using the same technique for the flywheel. I could not drill three holes. A steel rod with a point turned on it was used to mark the hole location. The two plates were clamped to gather, and the holes were transferred to the motor plate.
A large circle was needed for the gearbox plate. My plasma cutter could not cut a 10mm Aluminium plate. The heat conducted away too quickly. A water jet company could cut it but had a $120 minimum cutting charge. My portable jig electric jigsaw was able to do it, but it took an hour to do
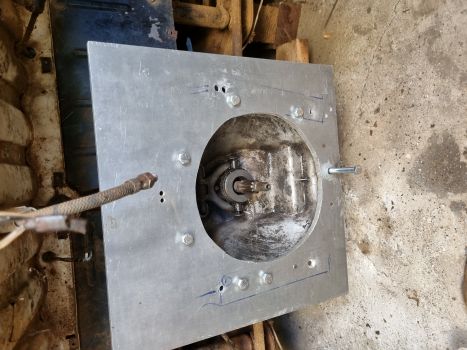
The plates needed to be separated by 45mm. Strips of Aluminium were cut using a wood saw bench. Longer bolts were used to clamp the assembly together. I put grease onto the clutch shaft and assembled it. The mark on the grease proved the spacing was correct.
 45mm spacing needed
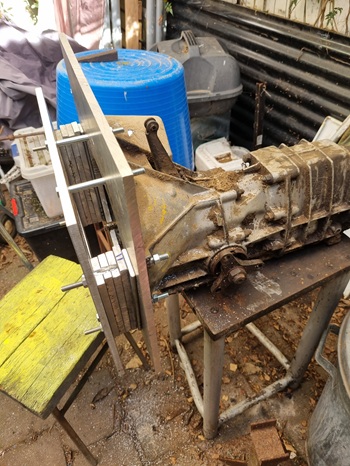
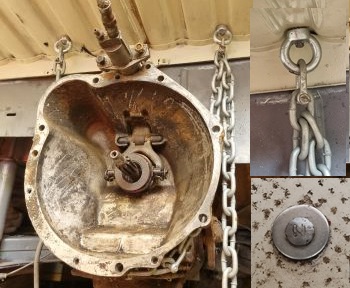
Fitted a chain to hold the gearbox. Previously used blocks of wood on the floor. Can now move the car. Insert showing the eye bolt. The rear luggage compartment was double-skinned, and a coach bolt was used. Will cover it with existing felt and a new rubber mat.
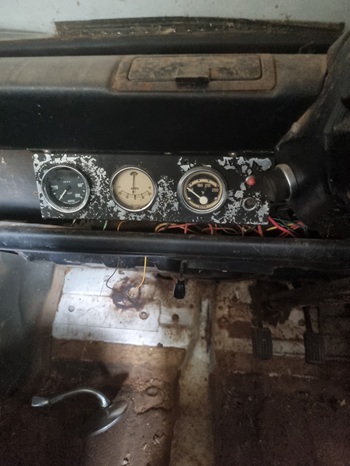
In the 1970s, I fitted three gauges. Oil Pressure (mechanical with a plastic tube to the back), an ammeter and a temperature gauge (electrical). Also, a reversing light switch with an indicator light. The gauges cover the parcel shelf.
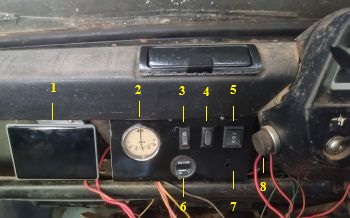
New Control Panel
1 Display for the motor controller
2 Original Ammeter, have not found a digital bi-directional one.
3 Switch for the windscreen washers. The original was a rubber bulb hand pump. (8)
4 Mode switch. Standard and Sports
5 Motor control switch. Forward, Off and Reverse.
6 Digital voltmeter for 12v car battery
7 Regenerative braking potentiometer, to be fitted.
8 Windscreen washer pump.
The control panel is to be wired up. The gap is to allow the air duct to the windscreen. The Imp was a budget car!